
Full Waste Toner Bottle Error: Replacement for Lexmark CX522ade and CX625ade
An overflowing waste toner container can cause print issues and disrupt productivity. This guide will show you how to replace the waste toner container, helping you maintain smooth printer operation, prevent toner buildup, and achieve high-quality prints.
The following tutorial is for these Lexmark models:
C2325dw
C2425dw
C2535dw
CS421dn
CS521dn
CS622de
CX421adn
CX522ade
CX622ade
CX625ade
CX625adhe
MC2325adw
MC2425adw
MC2535adwe
MC2640adwe
When Do You Need to Replace the Waste Toner Container?
If your printer shows a waste toner container full error, it likely needs replacement. Here are common signs to watch for:
Error code: 82.00, 82.02, 82.09 - Waste toner container is nearly full.
Error code: 82.3, 82.32, 82.33, 82.39 - Replace the waste toner container.
Error code: 31.35, 31.35A, 31.35B - Reinstall the missing or unresponsive waste toner container.
Step-by-Step Guide: Replacing the Waste Toner Container
Prior to starting, it is imperative to remember power off the device and disconnect from its power source at the back.
This step-by-step tutorial will further break down the steps to remove and replace the waster toner container for the Lexmark C2325dw, C2425dw, C2535dw, CS421dn, CS521dn, CS622de, CX421adn, CX522ade, CX622ade, CX625ade, CX625adhe, MC2325adw, MC2425adw, MC2535adwe, MC2640adwe. Let’s begin!
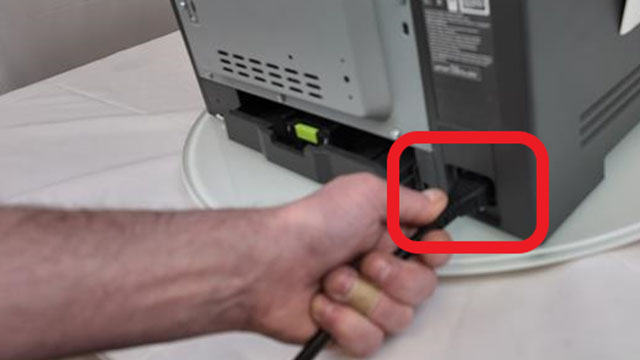
Step One: Power Off Printer
Power off the printer and unplug the power cord from the outlet.
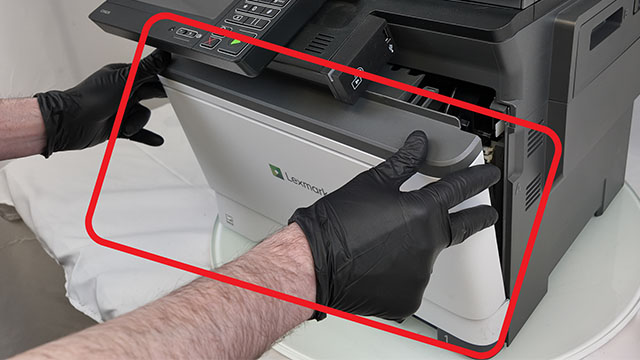
Step Two: Open Front Door Assembly
Pull down the front door assembly to open it.
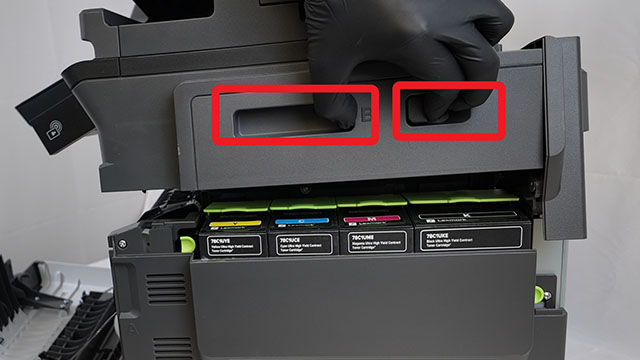
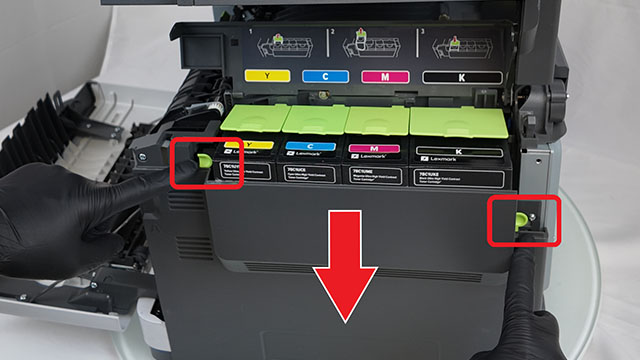
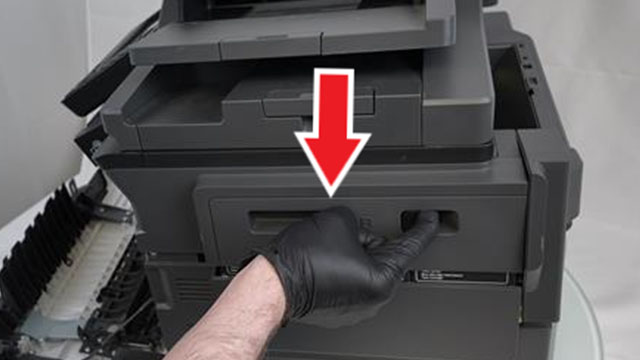
Step Three: Open Scanner Right Cover
To access the waste toner container, press the two tabs to release the scanner right cover, then lift it up.
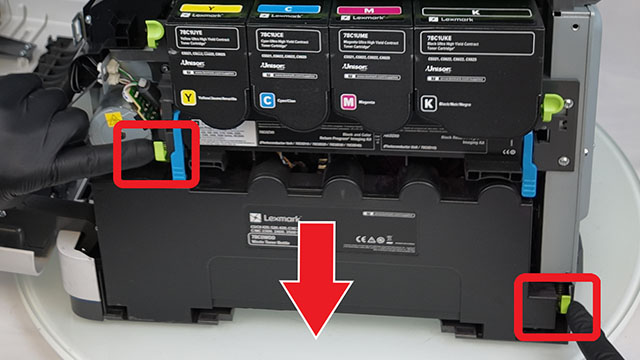
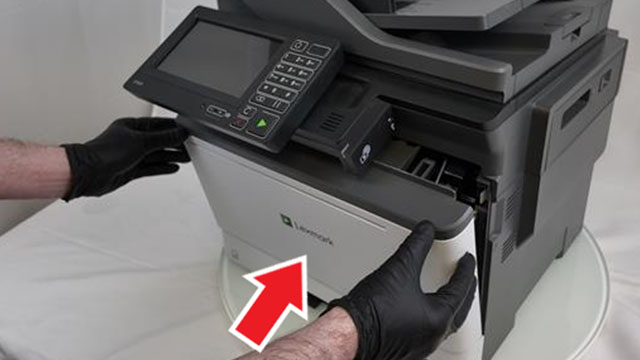
Step Four: Remove Right Cover
Press the two tabs and pull out the right cover to remove it.
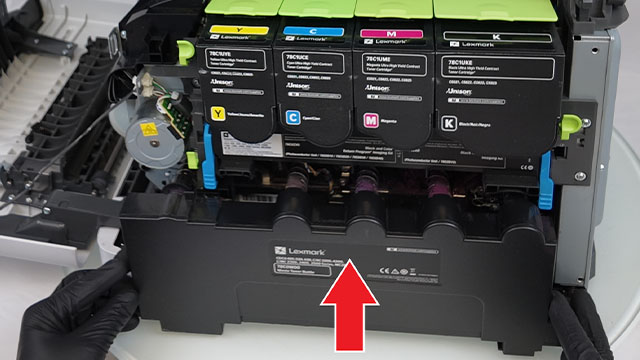
Step Five: Remove Old Waste Toner Container
Press the tabs, then slide out the old waste toner container to remove it.
Step Six: Install New Waste Toner Container
Slide the new waste toner container into place until it clicks securely.
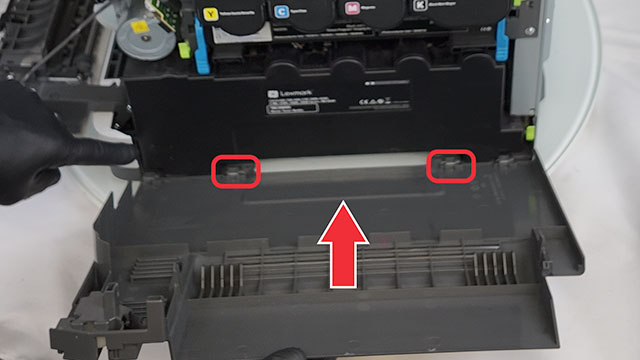
Step Seven: Attach Right Cover
Align the tabs at the bottom of the right cover first, then push it up until it locks securely in place.
Step Eight: Close Scanner Right Cover
Push down the scanner right cover to close it securely.
Step Nine: Close Front Door Assembly
Close the front door assembly.
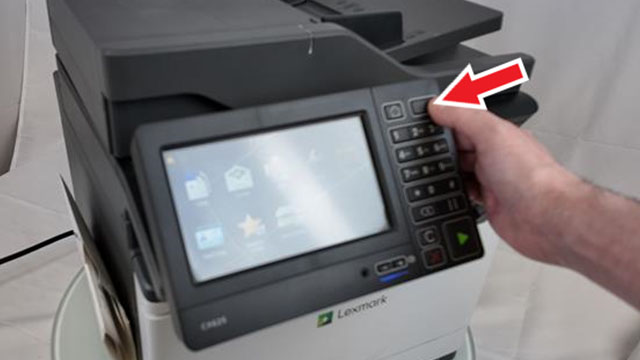
Step Ten: Power Printer On
Firmly plug the power cable into both the printer and a power outlet. Then, turn on the printer using its power button.
The Benefits of Replacing Your Printer's Waste Toner Container
Replacing the waste toner container (MPN: 78C0W00) is essential for maintaining your printer’s performance and preventing potential issues. A full waste toner container can lead to toner overflow, causing messy leaks inside the printer that may damage internal components and reduce print quality. Ignoring replacement warnings can also result in printer errors, leading to downtime and disrupted workflow. By installing a new waste toner container, you help maintain smooth operation, keep prints crisp and clean, and extend the lifespan of your printer.
Order Your Replacement Parts Today!
Order the replacement parts needed for this step-by-step tutorial right here:
Follow Us on YouTube for More Tutorials
Stay connected with us on YouTube for more valuable content.
Need More Help?
If you need more assistance with sales, repairs, or identifying a part, contact us.