
End of Life Error: Xerox C310 and C315 Black and Color Imaging Kit Replacement
A depleted imaging drum kit can lead to reduced print quality and unexpected disruptions. This guide will walk you through replacing the imaging kit to maintain sharp prints, prevent errors, and ensure your printer operates efficiently.
The following tutorial is for these models:
C310
C315
When Do You Need to Replace the Imaging Kit ?
If you're experiencing print quality issues, it may be a sign that the imaging kit needs to be replaced. Below are common issues and error codes that indicate a potential problem:
31.60z - Black imaging kit or photoconductor smart chip or sensor problem.
31.65z, 32.65z - Black and color imaging kit smart chip or sensor problem.
33.64z - Non-Xerox black and color imaging kit. The smart chip contents have been manipulated by a third party manufacturer.
84.11, 84.13, 84.19 - The imaging kit is low.
84.21, 84.29 - The imaging kit is very low.
84.31 , 84.41- Replace the imaging kit. Zero estimated pages remain.
84.43 - Replace the imaging kit. Zero estimated pages remain. Absolute end of life has been reached due to page count.
Blurred or Light Prints
Unwanted Background or Shadowing
Missing or Faded Areas
Colored Line Defects
Step-by-Step Guide: Replacing the Toner Cartridge
Prior to starting, it is imperative to remember power off the device and disconnect from its power source at the back.
This step-by-step tutorial will further break down the steps to remove and replace the imaging kit for the Xerox C310 and C315. Let’s begin!
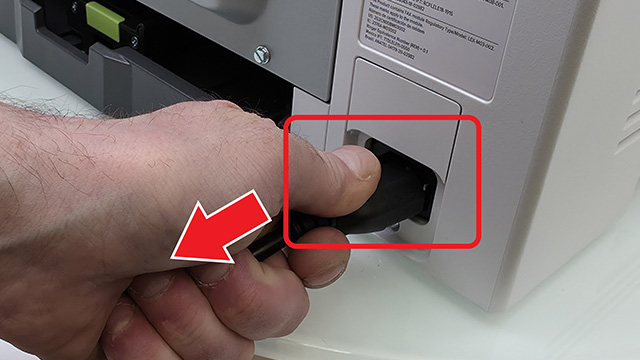
Step One: Power Off Printer
Turn off the printer and unplug the power cord from the electrical outlet.
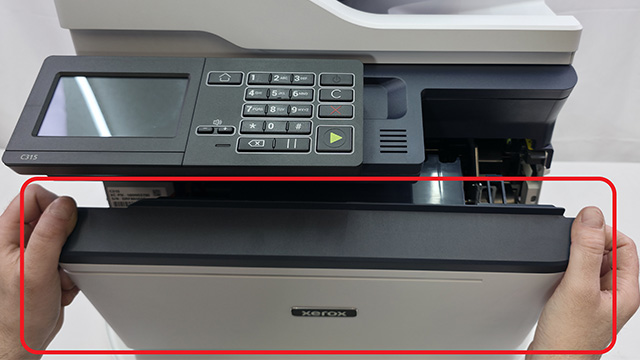
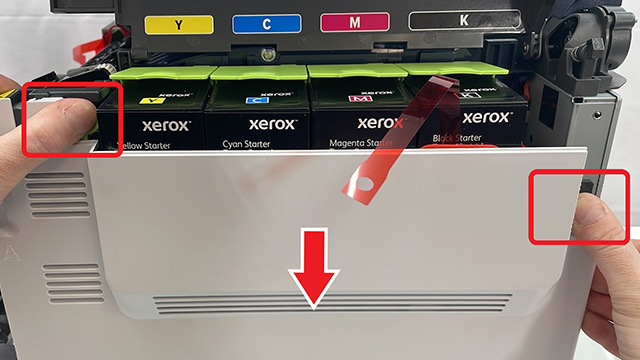
Step Two: Open Front Door Assembly
Grip both sides of the front door and pull it down to open.
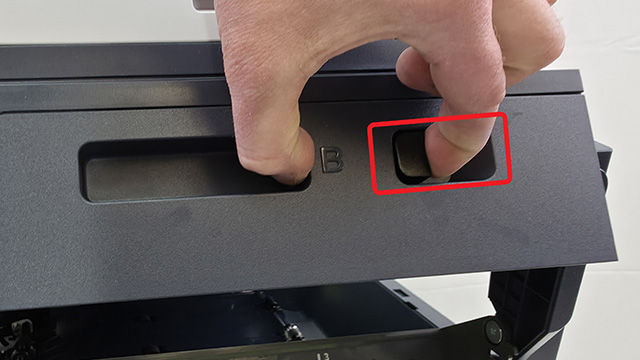
Step Three: Open Scanner Assembly
To access the imaging kit, press the release tab to unlock the scanner, then lift it upward.
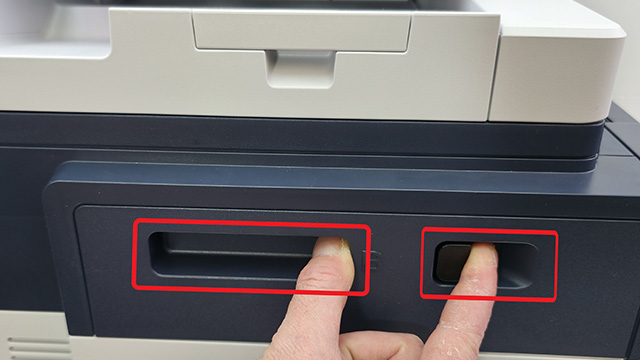
Step Four: Remove Right Cover
Press the two tabs and pull the right cover outward to remove it. Set the cover aside.
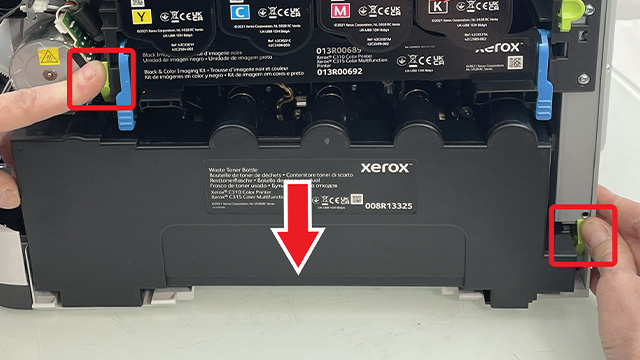
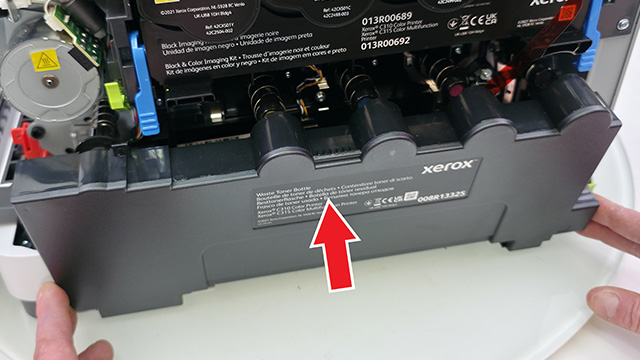
Step Five: Remove Waste Toner Bottle
Push in the tabs, then carefully slide out the waste toner bottle. Avoid dropping it to prevent toner spills.
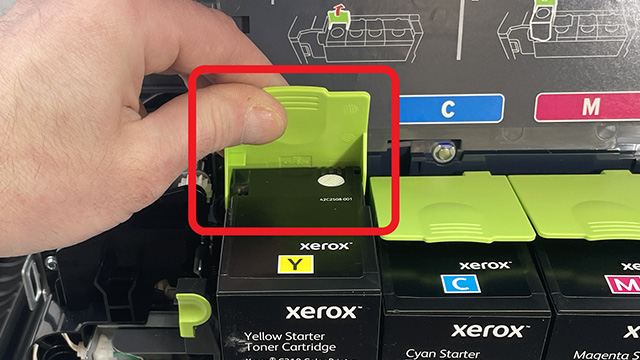
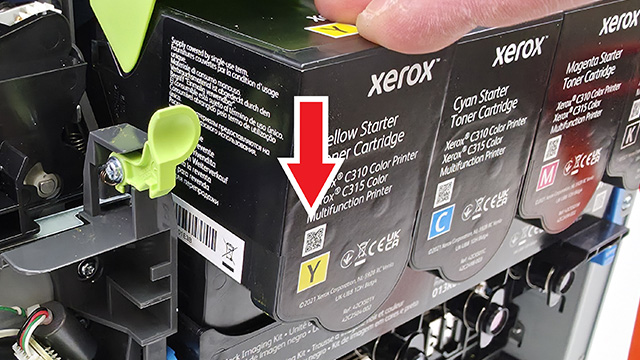
Step Six: Remove Toner Cartridges
Lift the green tabs to unlock the toner cartridges. Repeat this step for all colors.
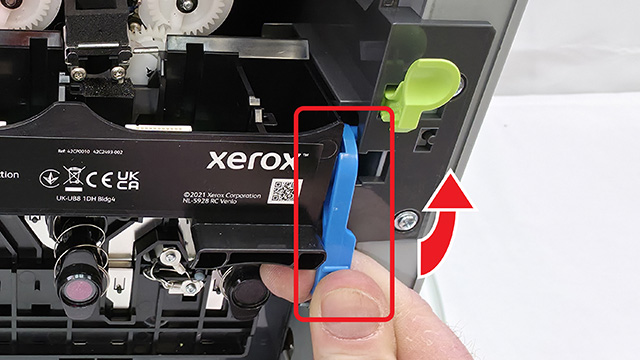
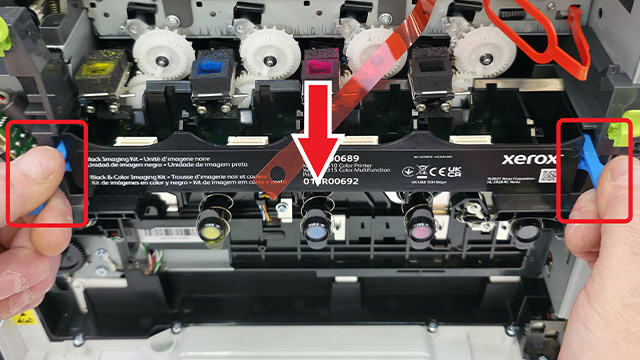
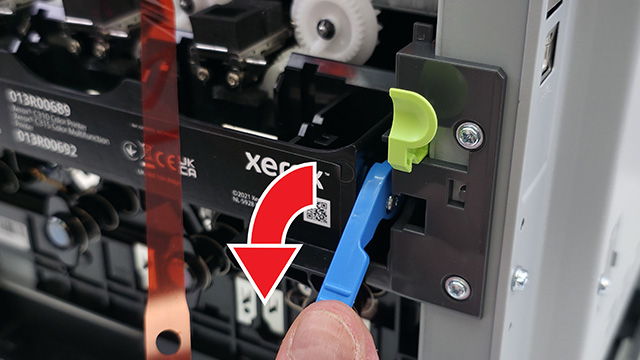
Step Seven: Unlock Imaging Kit
Lift the blue latches on each side to unlock the imaging drum kit.
Step Eight: Remove Imaging Kit (Part 1)
Slowly pull both blue latches outward until they stop. Do not force the imaging drum kit out.
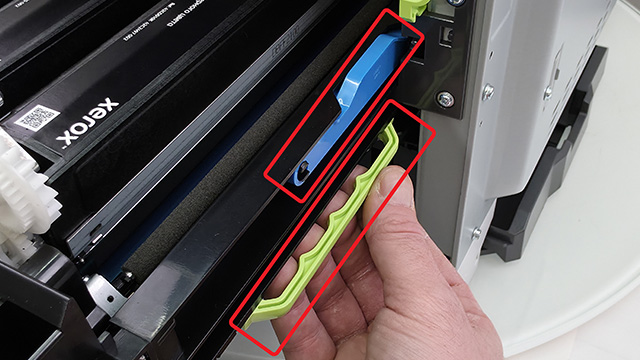
Step Nine: Remove Imaging Kit (Part 2)
Press and hold the two green handles on each side along with the blue latch on the right, then slide the imaging drum kit out to remove it.
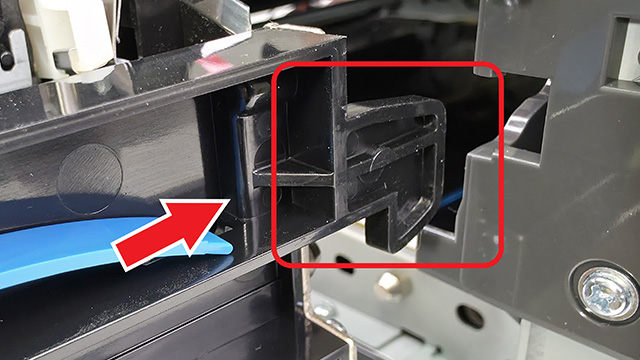
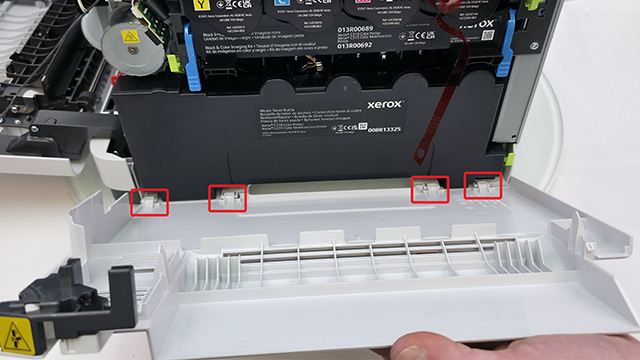
Step Ten: Install New Imaging Kit (Part 1)
To install the new imaging drum kit, lift it using the two green handles on each side. Then, align the hooks with the guides inside the printer.
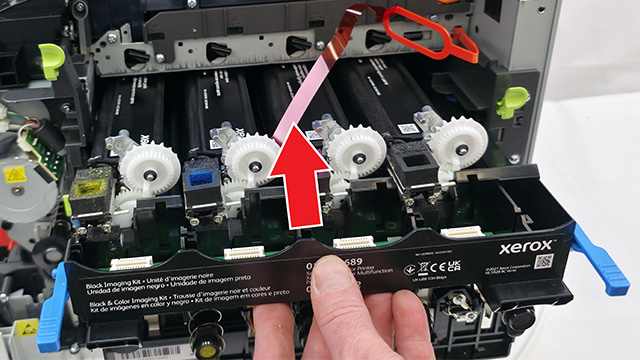
Step Eleven: Install New Imaging Kit(Part 2)
Once the hooks on both sides are aligned, carefully slide the imaging kit into the printer. It should click into place when properly secured.
Step Twelve: Lock Imaging Kit
Lower the two blue latches to lock the imaging kit in place.
Step Thirteen: Install Toner Cartridges
Place the toner cartridge into its slot and gently press down to lock it in place.
Step Fourteen: Install Waste Toner Bottle
Align the holes on the waste toner bottle with the guides inside the printer, then push it in until it clicks into place.
Step Fifteen: Attach Right Cover
First, align the tabs at the bottom of the right cover, then push it upward until it locks securely into place.
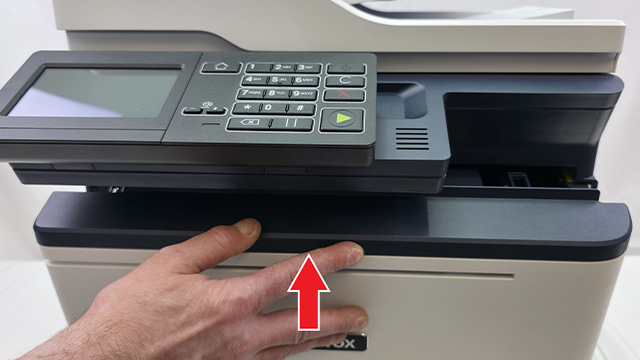
Step Sixteen: Close Scanner Assembly
Press the release tab, then push down the scanner’s right cover until it closes securely.
Step Seventeen: Close Front Door Assembly
Close the front door assembly.
Step Eighteen: Power On Printer
Firmly plug the power cable into both the printer and a power outlet. Then, turn on the printer using its power button.
The Benefits of Replacing Your Printer's Imaging Kit
Replacing the imaging kit unit (MPN: 013R00689) helps maintain optimal printer performance, delivering clear, streak-free prints. It also reduces the risk of print errors and hardware strain over time. This is essential for users who rely on their Xerox C310 and C315 series printers for consistent, dependable results.
Order Your Replacement Parts Today!
Order the replacement parts needed for this step-by-step tutorial right here:
Follow Us on YouTube for More Tutorials
Stay connected with us on YouTube for more valuable content.
Need More Help?
If you need more assistance with sales, repairs, or identifying a part, contact us.