
Canon DR-G2140 Scanner Paper Jam Fix: How to replace the Exchange Roller Kit
Struggling with Exchange Roller Kit replacement in your Canon DR-G2140? Our step-by-step guide ensures a smooth printer operation.
The following tutorial is for these models:
imageFORMULA DR-G1100
imageFORMULA DR-G1130
imageFORMULA DR-G2110
imageFORMULA DR-G2140
When Do You Need to Replace the Exchange Roller Kit?
If you're getting error messages, this may indicate it's time to replace the exchange roller kit. Listed here are all the errors that indicate a problem:
P000 - The document is jammed on the transport path.
P001 / P002 - The document is jammed near the feed inlet.
P004 / P006 / P007 - The document is jammed inside the scanner.
P010 - It is possible that the multiple documents are jammed inside the scanner.
Step-by-Step Guide: Replacing the Exchange Roller Kit
Prior to starting, it is imperative to remember power off the device and disconnect from its power source at the back.
This step-by-step tutorial will further break down the steps to remove and replace the exchange roller kit for the Canon DR-G2140. Let’s begin!
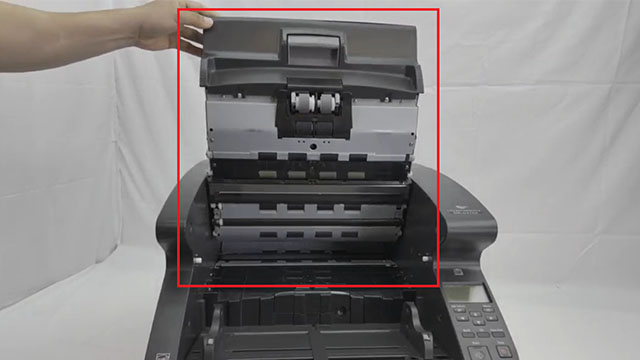
Step One: Open Upper Unit
To begin, press the lever and carefully open the upper unit.
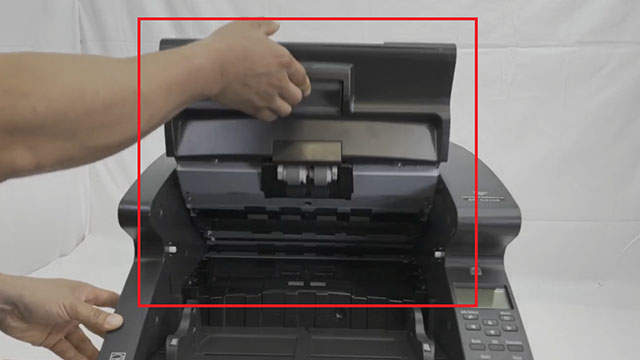
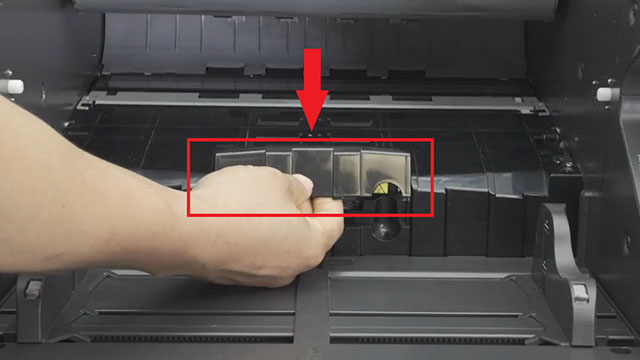
Step Two: Open Pickup Roller Cover
Open the roller cover.
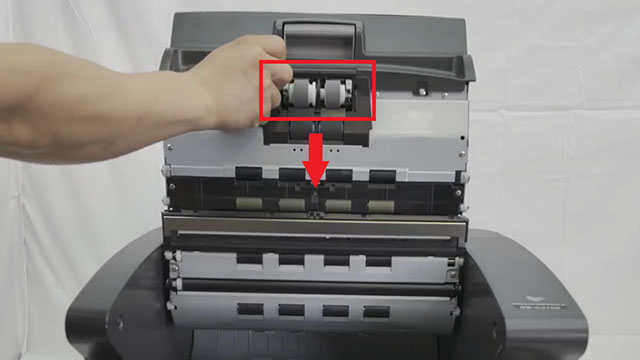
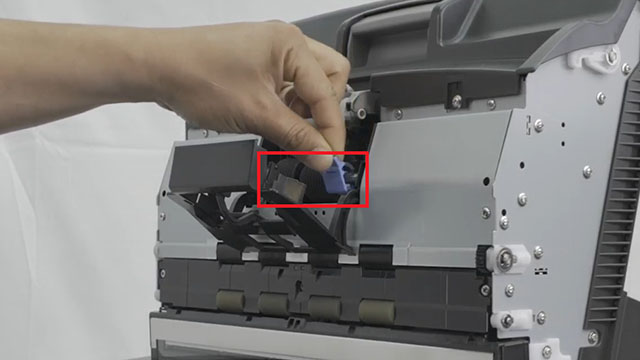
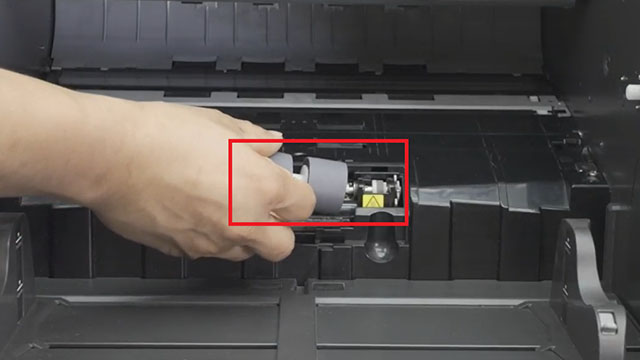
Step Three: Remove Pickup Roller
Push the roller holder back and remove the pickup roller.

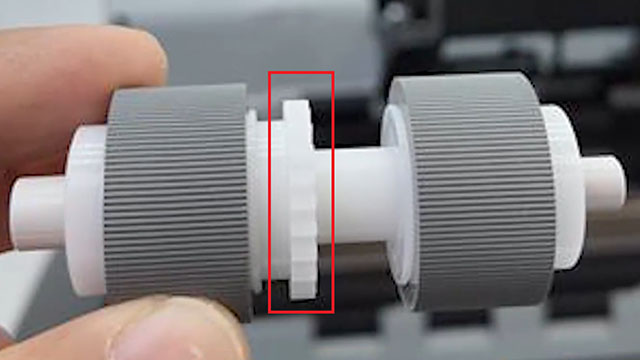
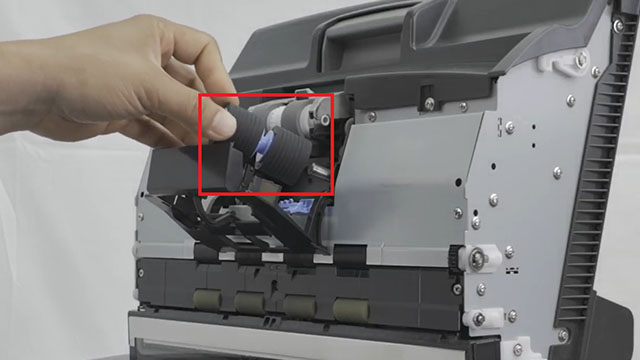
Step Four: Install new Pickup Roller
Install the new pickup roller so that the side of the gear is on the left.
Step Five: Remove Feed Roller
Pull the roller lock lever down to release the roller. Slide the feed roller to the right, then pull the roller towards you to remove.
Step Six: Install New Feed Roller
Place the new feed roller on the pin. Then, push the feed roller back in place and align the notch in the roller's axle with the shaft on the scanner. Push the roller lock lever up to lock the feed roller.
Step Seven: Close the Roller Cover
Push up to close the upper roller cover.

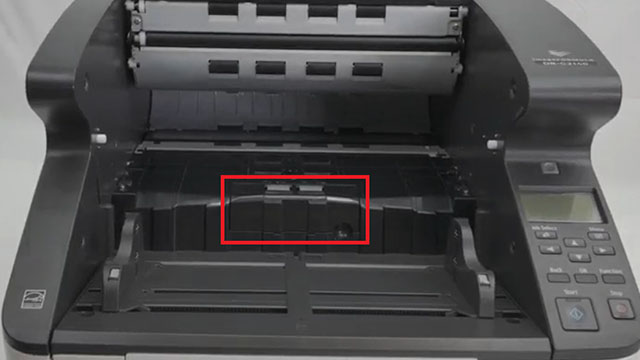
Step Eight: Remove Retard Roller Cover
Grasp and pull up the retard roller cover to remove it.
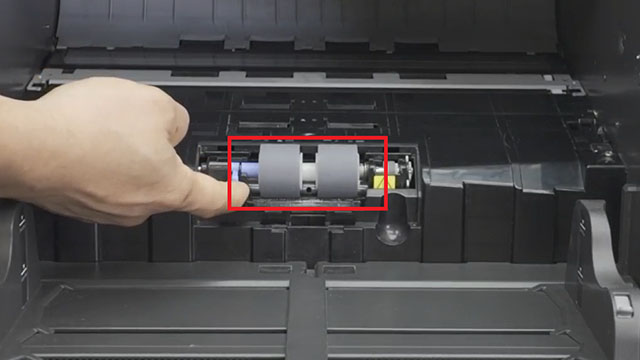
Step Nine: Remove Retard Roller
Push the roller lock lever up and move it to the left to unlock the roller. Then, slide out the retard roller to remove.
Step Ten: Install New Retard Roller
Align the roller cutout with the axle on the scanner. Slide the roller securing lever to the right, then pull the roller lock lever down to secure the retard roller in place.
Step Eleven: Installing Retard Roller Cover
Push the front of the retard roller cover in and make sure the cover is completely closed by pushing until you hear a click.
Step Twelve: Close Upper Unit
Lastly, carefully push down the upper unit to close.
Order Your Replacement Parts Today!
Order the replacement parts needed for this step-by-step tutorial right here:
3601C002, 3601C002AA, 8262B001, 8262B001AA - Canon DR-G2140 Exchange Roller Kit
Follow Us on YouTube for More Tutorials
Thank you for completing this step-by-step tutorial! We hope you found it useful. Stay connected with us by following our YouTube channel and subscribing for more valuable content. We would love to hear from you, so please leave a comment.
Click here to view Item, Inc. YouTube channel.
Need More Help?
If you need more assistance, contact us. For sales, repair, or unsure about a part, call us, use our chat feature, or email us. We're here to help in any way!