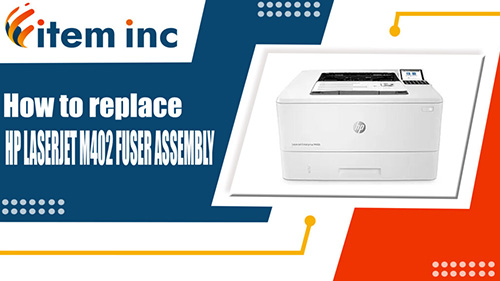
How to replace HP LaserJet M402 Fuser Assembly

Click here to view video version
Struggling with replacing the fuser assembly in your HP LaserJet M402? Our detailed guide will walk you through each step to keep your printer operating efficiently.
The following tutorial is for these models:
M402d, M402n, M402dn, M402dw, M403n, M403d, M403dn, M403dw, M404dn, M404dw, M404n, M406dn, M426dw, M426fdn, M426fdw, M427dw, M427fdn, M427fdw, M428fdn, M428fdw, M430f
WHEN DO YOU NEED TO REPLACE THE FUSER ASSEMBLY?
If you're getting error messages, this may indicate it's time to replace the Fuser Assembly. Listed here are all the errors that indicate a problem:
50.XX fuser errors:
50.00 = Generic Fuser error
50.10 = Low Fuser temperature error
50.11 = High sub thermistor area 3 fuser error
50.12 = Low sub thermistor area 3 fuser error
50.20 = Slow fuser error
50.30 = High fuser temperature error
50.40 = Fuser drive circuit error
50.70 = Fuser open error
50.80 = Low sub thermistor fuser error
50.90 = High sub thermistor fuser error
STEP-BY-STEP GUIDE: REPLACING THE FUSER ASSEMBLY
Prior to starting, it is imperative to remember power off the device and disconnect from its power source at the back.
This step-by-step tutorial will further break down the steps to remove and replace a Fuser Assembly for the HP LaserJet M402. Let’s begin!
STEP ONE: REMOVE PAPER TRAY
To begin, remove the paper cassette tray by pulling it straight out.

STEP TWO: OPEN FRONT DOOR AND REMOVE TONER
Open the front cartridge door by pressing the door release on the right cover. Remove the toner cartridge.

STEP THREE: REMOVE LEFT COVER SCREWS
Remove the screw on the left cover.

STEP FOUR: OPEN REAR DOOR ASSEMBLY
Open the rear door assembly.

STEP FIVE: REMOVE LEFT COVER
Remove the left cover by releasing the locking tabs. Indicate the location of the locking tabs.

STEP SIX: REMOVE RIGHT COVER
With the rear door assembly still open, remove the right cover by releasing the locking tabs.

STEP SEVEN: REMOVE REAR DOOR SCREWS (BASE MODEL)
Remove the screws on the left and right of the rear door. Slide out the rear door assembly.

STEP EIGHT: REMOVE REAR DOOR SCREWS (DUPLEX PRINTER)
This step will only apply if you have a duplex printer (M402dn). Press the green paper guide release to remove the rear door assembly.

STEP NINE: REMOVE FUSER CABLE COVER
Remove the fuser cable cover.

STEP TEN: REMOVE FUSER CABLES
Carefully remove the fuser cables (two on the rear and one on the power supply).

STEP ELEVEN: REMOVE FUSER SCREWS
Remove 2 screws on the left side and 2 on the right side of the fuser.

STEP TWELVE: RELEASE PRESSURE LINK ARM
Pull down the pressure release link arm.

STEP THIRTEEN: REMOVE FUSER
Carefully slide out the fuser.

STEP FOURTEEN: INSTALL NEW FUSER
Insert the new fuser.

STEP FIFTEEN: SECURE NEW FUSER
Replace the 4 screws (2 on the left and 2 on the right).

STEP SIXTEEN: RECONNECT FUSER CABLES
Reconnect the fuser cables.

STEP SEVENTEEN: REINSTALL FUSER CABLE COVER
Reinstall the fuser cable cover.

STEP EIGHTEEN: REINSTALL REAR DOOR ASSEMBLY
Insert the rear door assembly in place and put the screws on the left and right side.

STEP NINETEEN: LOCK DUPLEX UNIT (DUPLEX PRINTER)
If you have the duplex version, lift to lock the duplex unit back in place.

STEP TWENTY: REOPEN FRONT DOOR
If the front door is closed, you can reopen it by inserting the screwdriver into the front door release hole.

STEP TWENTY-ONE: INSTALL AND ALIGN RIGHT COVER
Install the right cover by locking the back first and work your way to the front. Make sure the right cover aligns just right with the top cover and no gaps are visible.

STEP TWENTY-TWO: INSTALL LEFT COVER
Stand the machine on its side, start from the back and work your way to the front.

STEP TWENTY-THREE: SECURE LEFT COVER
Replace the screw from the front.

STEP TWENTY-FOUR: REINSERT TONER AND POWER
Reinsert the toner cartridge. Reconnect the power cord.

STEP TWENTY-FIVE: TURN ON PRINTER
Turn the printer on. The error message should have disappeared.

ORDER YOUR REPLACEMENT PARTS TODAY!
RM2-2554, RM2-2554-000, RM2-2554-000CN, RM2-5399, RM2-5399-000, RM2-5399-000CN, C5F92-69002 - HP – FUSER, 110V
FOLLOW US ON YOUTUBE FOR MORE TUTORIALS
Thank you for completing this step-by-step tutorial! We hope you found it useful. Remember to stay connected with us by following our YouTube channel and subscribing for more important content. We would love to hear from you, so please leave a comment.
Click here to view Item, Inc. YouTube channel.
NEED MORE HELP?
If you need more assistance, contact us. For sales, repair, or unsure about a part, call us, use our chat feature, or email us. We're here to help in any way!
